Showing posts with label pinball. Show all posts

Tuesday, December 14, 2010

Brmlab & Lasers!


I just got back to my home in Brazil yesterday. Travelling in Europe was great and I'd like to share here the details of some cool things I've done in my last week there.

My last stop in Europe was Prague and there was a special reason for that. Three months ago I received an email from Cestmir Houska, one of the members of Brmlab - the Prague hackerspace. Cestmir was contacting me because he got inspired by my photos and blogposts about the Party Land Remake project. He told me that building a pinball machine was one of his dreams from childhood (which happens to be my case also) and that he wanted to keep in contact so that we can help each other in making it become a reality.

Since we are both members of recently inaugurated hackerspaces we figured out that our pinball projects could be understood as a healthy collaboration between them, mutually. So we are planning to design, document and simultaneously build two pinball machines: one in Garoa Hacker Clube, in São Paulo, Brazil; and the other one in Brmlab, in Prague, Czech Republic.

So, since I had the opportunity to visit Europe again due to the Mozilla Drumbeat Festival in Barcelona, I decided to schedule a visit to Prague (which resulted in my visit to Metalab in Vienna also).

In one of the days that I was there at Brmlab, one guy showed me his personal project: a homebrew laser projector. It is composed of 3 lasers (Red, Green and Blue) and a pair of mirrors that are rotated by motors so that the laser beam aims at the wall in different possible angles. By properly controlling those lasers and mirrors, one can draw colorful shapes on the wall. The effect is even more interesting if you add some fog to the room :-)

So I promptly asked him what software he was using to run the laser projector and the answer was: iShow, a proprietary software. I still inquired about free software implementations of drivers or controlling software but he was not aware of any existent efforts. So we decided to start doing that right away. We installed an USB sniffer on his Windows machine and started reverse engineering the protocol used by the device. In half an hour we had our first line drawn by sending URBs through a python script running on my GNU/Linux. Then we spent more 3 or 4 days improving the python module (all source code is in my personal svn repository at Google Code) and implementing some demos:

GML, SVG and ILDA


We wanted to display the Brmlab logo, so I decided to do that by implementing a simple SVG loader. It parses the SVG file and reads the d attribute of all tags. Then each path command from the SVG path description results in the respective drawing routines for our laser device.

The result can be seen in this photo:


Then I remembered GML! Grafitti Markup Language is an XML specification for storing grafitti data. That basically means x,y,z and time coordinates. I have used a python module called PyGML to render some GML files with our laser.


Another relevant data format is called ILDA. It is a file format for storing laser-show animations. It was developed by the International Laser Display Association (which explains the acronym ILDA). Using this python module we got some ILDA animations running on our projector :-)

A clock!


This is a simple analog clock displaying the current local time.


A pong game


Cestmir has implemented a pong game using the pygame library and rendering on the laser display.


When we decided to display scores in the game, we faced the challenge of creating a font for our laser display and font rendering routines. The first 3 charachteres (0, 1 and 2) were designed by imagining the shapes and manually inputing the values of the coordinates of the bezier control points for the glyphs. At that point we decided we should implement a tool... (more on that topic in a future blogpost)

A server for sharing the display


While we were working on this project it became clear that the laser was a scarce resource. We had 4 people hacking on it and it was starting to become common to hear the sentence "Can I use the laser now?" (same sentence I've heard a lot in Vienna a week earlier, but refering to a significantly different machine...).

It reminded me of stories about the early days in computing when people disputed CPU time in universities and research institutes computers. And then multi-user time-sharing systems were developed. So I decided to develop something analogous for our laser display: a server that collects rendering requests from clients and manages to merge them on the real device.

The server receives commands through telnet and manages individual double buffering for each connected user. When a user disconnects, only his/her portion of the drawing disappears from the screen. I also adapted our python module so that it would delegate rendering to a remote server when you pass an IP address to its contructor; otherwise it would render in a local device connected to the USB bus.

That way we could have several users rendering content to the display simultaneously. One possible use of that would be running a script that draws a clock all the time on a corner of the display screen. Here is an example of that (the clock script and another scipt drawing some bezier curves been run remotely by two different users simultaneously):


27C3


Several people from the Brmlab hackerspace will attend the 27th Chaos Communication Congress (27C3) and they are planning to present the laser projector there!

Friday, December 03, 2010

Pinball Hacking in Vienna


I am currently in Vienna, Austria, visiting the Metalab Hackerspace. They have a very nice EPILOG 36EXT laser cutter there and I couldn't avoid using it to cut more parts for my pinball project! So I focused on the upper playfield (ramps, loops, P-U-K-E platform...).

This is what those parts are supposed to look like in the end:


And you can see how they look like now in these photos:


I still need to apply artwork to these acrylic parts. The stickers that I'll use in the project are these:


I also presented a speech about the project trying to get more people interested in hacking on pinball machines DIY manufacturing fun.

Then I also got the opportunity to help on the Roböxotica festival by laser-cutting the wood trophies for the cocktail robots contest!

Wednesday, April 21, 2010

Recent improvements on my pinball project


Last Sunday morning, Fabricio Zuardi and his friend "Ace of Spades" came to visit my place to check out the pinball machine and later, at night, we gathered with some other geeks to discuss homebrew 3d printers and related topics while drinking draft beer.

Fabricio took some pictures which he's just published in his Flickr account. The first photo in this post is CC BY Fabricio Zuardi

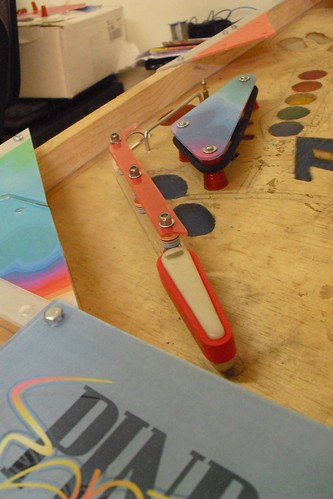
I have spent part of these last few days installing the decorative acrylics that I mentioned in my previous post. I have also installed some structural parts in the bottom portion of the playfield.

Months ago parts of my camping tent were stolen during Campus Party, but I saved its metal supporting stakes because I felt they would be somehow useful. Indeed, I have found a good way of using it in the pinball machine. By bending it with the help of pliers, I've transformed it into a separator that is placed between inlane and outlane. I think that the result is perfect!

There are some more photos at my flickr page.

Saturday, April 17, 2010

More decorative acrylic parts for my pinball machine


Months ago I have made the decorative acrylic parts for the upper loop of the machine. Yesterday I have ordered another batch of laser-cut acrylics. This time for the bottom part of the playfield.

In the following video I am using glue to add artwork to the acrylic parts:


And in this other video, as a final touch, I am cutting the excess of paper from the parts:

Tuesday, April 13, 2010

Visiting the Pacific Pinball Museum


I was planning to visit the National Pinball Museum in Baltimore during my visit to the USA, but it was far from any other place I was intending to visit. It turned out that I did not visit it. But I also decided to visit San Francisco Bay Area and some people told me that there is a pinball museum there too. So, I decided to check it out. I took the BART from San Francisco (where I was hosted in a friend's house) to Alameda - east bay - and visited the Pacific Pinball Museum!


When I arrived at the museum I introduced myself, telling them that I was looking for some advice on my homebrew pinball project and that I was also interested in buying some pinball parts for it. I was then introduced to Michael Schiess, the museum founder, who was very friendly and took me to a private tour around the warehouse where he stores the hundreds of machines that are not in the public area of the museum - either due to lack of space or because the machines need to be repaired/restored.


 There, Michael guided me through some interesting machines including the world's largest pinball game, which is played with a pool ball and whose flippers are activated by 110 volts coils:


  Then he started looking for some pinball parts for me, but he didn't have many spare parts. So he decided to give me a playfield, as a gift, so that I could take parts from it. He said to me that as it woudn't be possible for me to take the whole playfield to Brazil, I should remove the parts that interest me and then give the playfield wood (with the artwork of the game) to my host there in San Francisco. I liked the idea. He gave me a ride to the BART and then I brought the machine to Seth's place. Seth has lent me this shopping cart so that I could more easily move the pinball playfield around:


 So, I took it to NoiseBridge (a hacker space in San Francisco) and spent 3 or 4 hours removing all the parts from it. I have left the playfield wood in the public area of the hacker space so that anybody can use it for whatever project and I have sent them a notice in their mailing list. My personal suggestion is to hook it to the walls as a decorative item. Perhaps they could use a microcontroller to blink some leds also, just for astethic purposes.

Here are the parts that I've brought to Brazil:
* 32 orange posts
* 4 hit targets
* 5 red rubbers and 5 new shining pinball balls given to me by Michael


Thanks, Michael!

Saturday, April 10, 2010

Pinball hacking and personal fabrication


I consider that building a pinball machine at home during these last 4 years or so has been a strongly symbolic act. It has started as a need to materialize a proof of concept of a clever hack I once figured out was possible based on the knowledge I had acquired after spending lots of time and effort reverse engineering an old pinball simulation game. The proof of concept was not very hard and indeed the hack is already proven through some early experiments. But a corollary of this discovery was pretty obvious: I would have to build the real version of Pinball Fantasies sooner or later.

So I felt challenged and started to build it, just for fun. I was trying to do something that I had never done before and that I hadn't even heard of other people who had done similar projects. Building a homebrew pinball machine sounded to me like a very ambitious project. Nowadays I am aware that I am not the only geek working on custom pinball development (there is perhaps half a dozen other people in the world having fun with it such as Jeri Ellsworth), but I didn't know about that at the beginning of the project and so I felt alone and obliged to come up with my own solutions to overcome each of the challenges involved in the execution of the project.

Then, gradually, I started to perceive some interesting relations between this project and my previous (software-only) ones. I had been fighting for software freedom and access to knowledge for some time and now some of my practices from the software world were being replicated in the physical construction of the pinball machine. I had decided to publish every details of the project (including lots of photos and source code) because I felt that I should encourage other people to build things also. I was also refusing to use proprietary software and based on the same principles I was avoiding fabrication processes that I did not fully understand. For instance, I was not happy about relying on professional laser cuter services to build some of the acrylic parts of the machine. I wanted to cut the parts in a homebrew CNC machine that was designed and built by a friend that I met through one of the brazilian pinball club mailing lists. I have only used the professional laser service because my friend's machine was broken and he did not seem to have enough time to fix it.

I have also decided to use the Arduino controller board and it was a good reason for me to learn more about microcontrollers. I have then bought some dot-matrix-display modules and had to help a niche community of Arduino hackers to adapt code for controlling these displays (in my specific case, I needed to control 7 of these simultaneously). I have even discovered Inkscape while I was looking for a CAD software to draw blueprints of the machine (Inkscape is not CAD, but I stumbled upon it during the search). I quickly fell in love with it. I have become an Inkscape developer and this is one of the reasons why the pinball project was neglected during some long periods of several months with practically no pinball hacking and lots of SVG renderer implementation efforts.

But what motivates me to tell this story is that recently I have become aware of this trend of personal fabrication technologies. Projects like the RepRap and the CupCake CNC are bringing the hackability of free software to physical things. And after reading the articles about it on Make magazine, I've decided to try to use it on my pinball project. I think that it is a practice totally compatible with my feeling of a need of better understanding the processes of fabrication, instead of simply achieving the desired results. It is a matter of getting more and more autonomy to create and build things and it is also about feeling more empowered by the knowledge acquired.

Some time ago I felt the need of having a 3d model of the machine in order to make some design decisions. For example, to have a better notion of the space available for some pinball parts in the playfield and to decide on placement of some screws. But I had almost no knowledge of CAD software and for some reasons that would require me to tell another long story (perhaps I can talk about it in a future blog post), I got involved in GNU LibreDWG, which consumed me another bunch of months with no pinball hacking again :-P I have then tried to make 3d models of some pinball parts and then found this guy who had done it also for some commonly used parts and had made his CAD files available online.


My conclusion to this blog post is that I think it would be awesome for the pinball hacking hobby if we could gather more interested people to make 3d models of pinball parts and share them in some place like thingiverse.com and then it would be interesting to see people building such parts using homebrew 3d printers like the RepRap. I think that my first attempt at that will be trying to replicate bumper caps to look like the ones depicted in the artwork of the original version of the Pinball Fantasies game. I have tried to improvise bumper caps using chocolate mousse cups once and it looked great, but it was slightly larger than the ideal size and those wouldn't fit well in the layout of the PARTYland playfield I am building. I did not have a good solution to this bumper cap issue until now. It seems like RepRaps will be very useful for my pinball hacking fun.

I must just take care of not spending some additional months focused on building my own RepRap printer... I know that there is a big chance of it happening, given my usual behaviour, though :-P

A yellow bumper cap from modern machines:

The bumper caps depicted in the original game artwork:


My "chocolate mousse cup" bumper caps: